
 admin
adminA photo that looks fine on a phone can fall apart the moment it becomes a 12-inch print. Nothing about the file changed. What changed is how many pixels the printer spreads across each inch of paper, and at that density the softness you never noticed on a 6-inch screen becomes a mush of edges.
Converting a low-resolution photo to something print-ready is two jobs stacked together: getting the pixel count high enough for the size you want, and getting real detail into those pixels. How the numbers work first, then what to do with a file.
DPI and PPI are not the same number
The terms get used interchangeably and it causes real mistakes. PPI — pixels per inch — describes a digital file: how many image pixels land in each inch once you pick a print size. DPI — dots per inch — describes the printing hardware. An inkjet may lay down 1440 or 2880 dots per inch, but it uses many tiny dots per image pixel, so your file does not need to be that dense.
“300 DPI” is the phrase every print shop uses, and what they almost always mean is 300 PPI in your file. Photoshop’s Image Size dialog labels the same field “Resolution”. That field on its own changes nothing about quality — it is metadata describing intended print size. Retyping 72 into 300 without resampling does not add a single pixel.
The one calculation that decides everything
Pixels divided by 300 gives you inches. That is the whole formula. A 1200-pixel-wide image gives 4 inches of print width, and only adding pixels changes that.
| File dimensions | Max print at 300 PPI | Max print at 150 PPI | What that is good for |
|---|---|---|---|
| 640 × 480 | 2.1 × 1.6 in | 4.3 × 3.2 in | A thumbnail |
| 1024 × 768 | 3.4 × 2.6 in | 6.8 × 5.1 in | Booklet inset |
| 1500 × 1000 | 5 × 3.3 in | 10 × 6.7 in | Standard 5×7 with a light crop |
| 2560 × 1707 | 8.5 × 5.7 in | 17 × 11.4 in | Full-page magazine image |
| 4000 × 3000 | 13.3 × 10 in | 26.6 × 20 in | Framed wall print |
The 150 PPI column is not a cheat. Viewing distance changes the requirement — large-format shops routinely accept 150 PPI or lower for banners. The 300 figure applies to things people hold.
Rebuilt detail is not captured detail
Old-fashioned resizing — bicubic interpolation — looks at the pixels around a gap and averages them. More pixels, same information, softer picture. An AI upscaler does something categorically different: trained on pairs of degraded and sharp images, it sees a blurry stretch of hair and generates hair-like texture that plausibly could have produced that blur.
Plausibly is the load-bearing word. The model is not recovering information the sensor never captured or the JPEG encoder discarded. It synthesizes a convincing replacement. For skin pores, brick, foliage and fabric weave, nobody can tell. For anything a viewer knows the true shape of — a face, a license plate, a logo, a line of type — invention becomes error, and error at print size is glaring.
Edges and texture survive reconstruction intact; faces, type and JPEG blocks are where the model starts guessing.
The four places upscaling breaks
Faces below roughly 80 pixels tall. Under that, the eyes, nostrils and lip line are a handful of pixels each. Face restoration models produce a crisp, well-formed face — just not reliably the same person. On a family print, a subtly wrong relative is worse than a soft one.
Text. Letterforms are precise shapes and a generative model has no idea what the word says. Small type comes back sharp-edged and wrong: an 8 becomes a B, a serif grows where none existed. The Overchat AI product page for its HD tool says as much — because the model is generative, small text and fine logo detail can shift slightly.
JPEG compression artifacts. Heavy compression leaves 8×8 blocking and colored halos around high-contrast edges. Some models were trained to clean this; others treat the blocks as real structure and sharpen them into hard rectangles. A file saved, uploaded and re-saved several times is the hardest case there is.
Noise, particularly at high ISO. Chroma noise looks like colored speckle, and a model that reads it as texture renders it as detail — grain baked in permanently. Denoising gently first beats doing both in one pass.
Working through an actual file
Start with what you have and what you need. A 1600-pixel-wide scan destined for an 8×10 print needs 2400 pixels — a comfortable 1.5×. The same scan for a 20-inch print needs 6000 pixels, nearly 4×, which is where you start negotiating with reality.
Browser tools are the fastest way to see whether a file responds at all. Overchat AI’s HD Photo Converter takes JPG, PNG, WebP and iPhone HEIC, including screenshots; you drop the file in, leave the aspect ratio on “Same as original” or pick square, 4:5, 9:16, 4:3, 3:2 or 16:9, press Convert to HD, then drag a before-and-after slider. The page states about 30 seconds per photo, no watermark and no resolution cap on the download, with output around 2K on the long side — roughly 2560 pixels. That ceiling is the honest limit here: 2560 pixels is an 8.5-inch print at 300 PPI and no more.
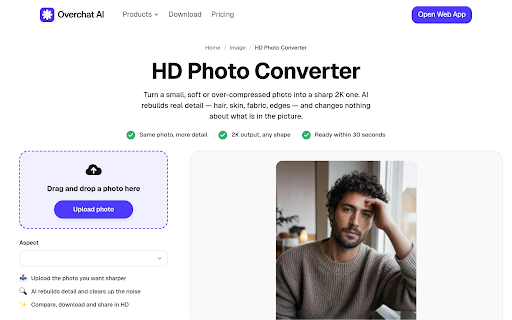
The free tier — 20 messages a day to basic models plus limited trial image generation — is one door into Overchat AI, an all-in-one app with 150+ purpose-built tools across image, video, audio and text, running models from GPT, Claude, Gemini, Grok, Kimi and Qwen on web, iOS and Android, with 350,000+ users. A Pro account costs $14.99 per month, or $59.99 paid once for twelve months. Separate ChatGPT Plus, Claude Pro and Google AI Pro subscriptions run about $59.99 a month combined — twelve months of Pro here, one month there.
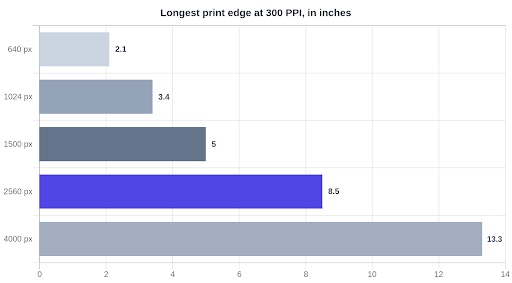
The pixel widths from the table above, converted to print inches; the highlighted bar is the 2560-pixel output ceiling of a typical browser HD tool.
When you need more than a browser can give
For prints past letter size, desktop software wins on ceiling and control.
| Tool | Runs where | Stated ceiling | Notable control | Weak spot |
|---|---|---|---|---|
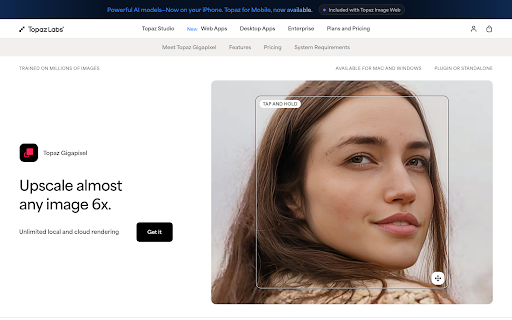
| Topaz Gigapixel | Mac and Windows app, or Photoshop and Lightroom Classic plugin | Advertised up to 16x pixels | Nine models, including Low Res, Text & Shapes and Face Recovery | Paid only; personal plans start at $29/month, or $149 billed annually |
| Let’s Enhance | Browser | Up to 512 megapixels, up to 16x | Prime, Gentle and Old Photo modes; Gentle is for small text | Accepts JPG, PNG and WebP only — no HEIC or raw |
| Upscayl | Linux, macOS and Windows app, plus a cloud version | Stated up to 16x | Batch processing and a model picker; nothing leaves your machine | Needs a capable GPU; no face-specific model |
| Overchat AI HD Photo Converter | Browser | About 2560 px on the long side | Aspect ratio choice and a before/after slider | Fixed 2K ceiling rules out large-format |
Checking the result before it costs you money
Judge the output at 100 percent zoom on a real monitor. Fit-to-screen hides everything; a phone display hides more. Walk the faces, then the text, then any repeating pattern where the model may have produced a smeared or looping texture.
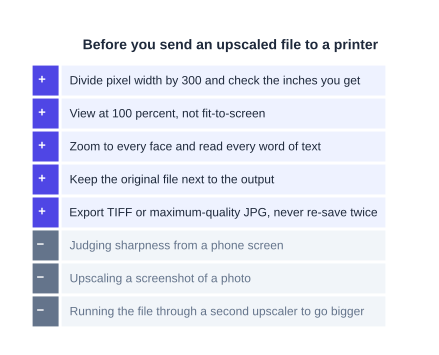
A pass to run on the exported file before a print shop turns it into something you have paid for.
Two habits save the most grief. Never run an output through a second upscaler for a bigger size — the second pass treats the first pass’s inventions as ground truth. And keep the original: if a print comes back wrong, the fix starts from the source file and a different model.
When the answer is not an upscaler
If the physical original still exists, rescanning beats any software. A 4×6 print scanned at 1200 PPI yields 4800 × 7200 pixels of captured detail, none of it invented. Reach for reconstruction when the pixels are all you have left, and check the print math before deciding how much of it you need.